Main Overview
Log in
When connecting to Geenodes™ via the link made available to you, you start with the login screen. Type your Geenodes™ username, usually your email address, and the password. Press 'enter' or click on “Sign in”. You will now open your personal Geenodes™ space.
Main screen

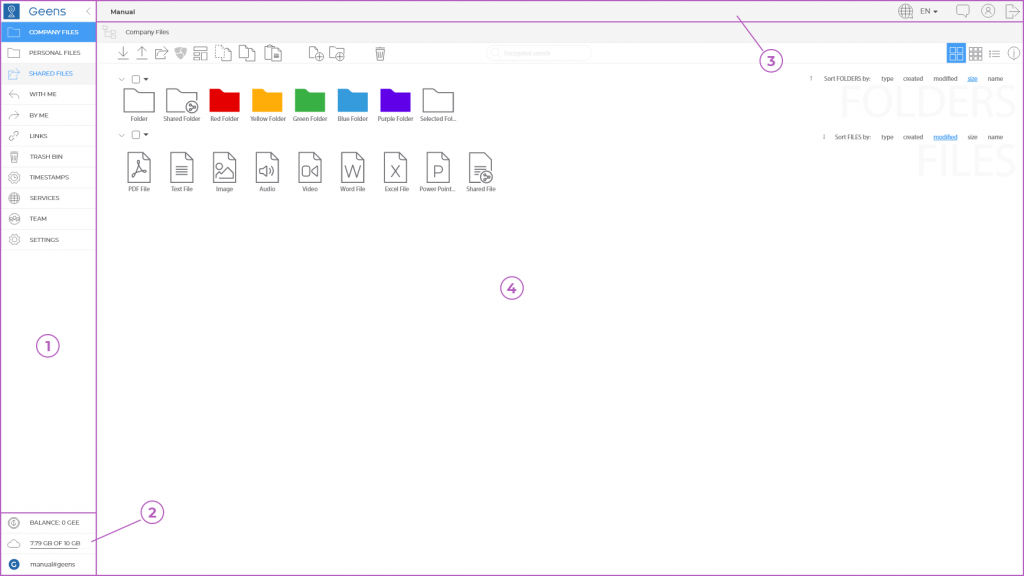
The Geenodes™ main screen is divided into 4 main areas. To have a good understanding of the working of your Geenodes™ platform these are explained first.
1. Top-side menu
This area allows you to switch between storage areas, Geenodes™ functions and settings.
2. Bottom side menu
Here you can find generic information regarding your account: the GEE credit balance, the used and available storage space and your account name.
3. Geenodes™ header
In the header on the left you see the name of the current Geenodes. Different accounts can be linked to different Geenodes™ instances.
On the right you see 3 icons for basic functionality; Feedback to Geenodes™ development team, a shortcut to your personal settings and the logout icons.
4. Content area
The main part of the screen is reserved for the content linked to the selection you have made in the Top function menu.
The view depends on your selected viewing option via the icons on the top right of the main application screen; Block, Grid or List.
When you click the ‘Details’ icon, all registered activities on that file/folder are shown in the new visible area on the right. By clicking the ‘Collapse’ icon, this area will be closed.
| See it in action! |
|---|